Group photographs can be challenging. You may have a few in your family photo collection— unidentified headless relatives, blurred ancestors, people with phone poles sprouting from their heads.
Many times group photos are taken as an afterthought, “Quick, Quick, before everyone leaves, let’s get a picture.” We’re lucky if we get a single name hastily scrawled on the back of the picture, let alone a detailed identification of everyone in the group.
I recently took second look at my paternal grandparents’ photo collection and the unidentified groups captured in film. A few years ago Dad gave me several old black photo albums and a few envelopes of loose snapshots. My grandmother was a schoolteacher for many years, and her attention to detail shows in the neat notes written in the margins of color photos. She adds dates, places, and events, but it’s hard to name a dozen people on the margin of a 4 x 4-inch print.
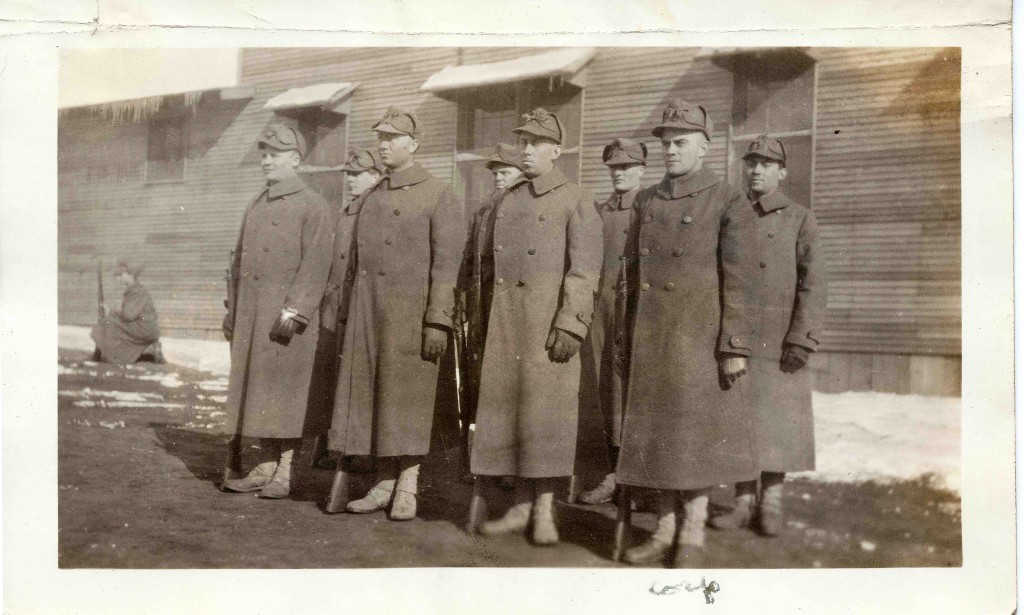
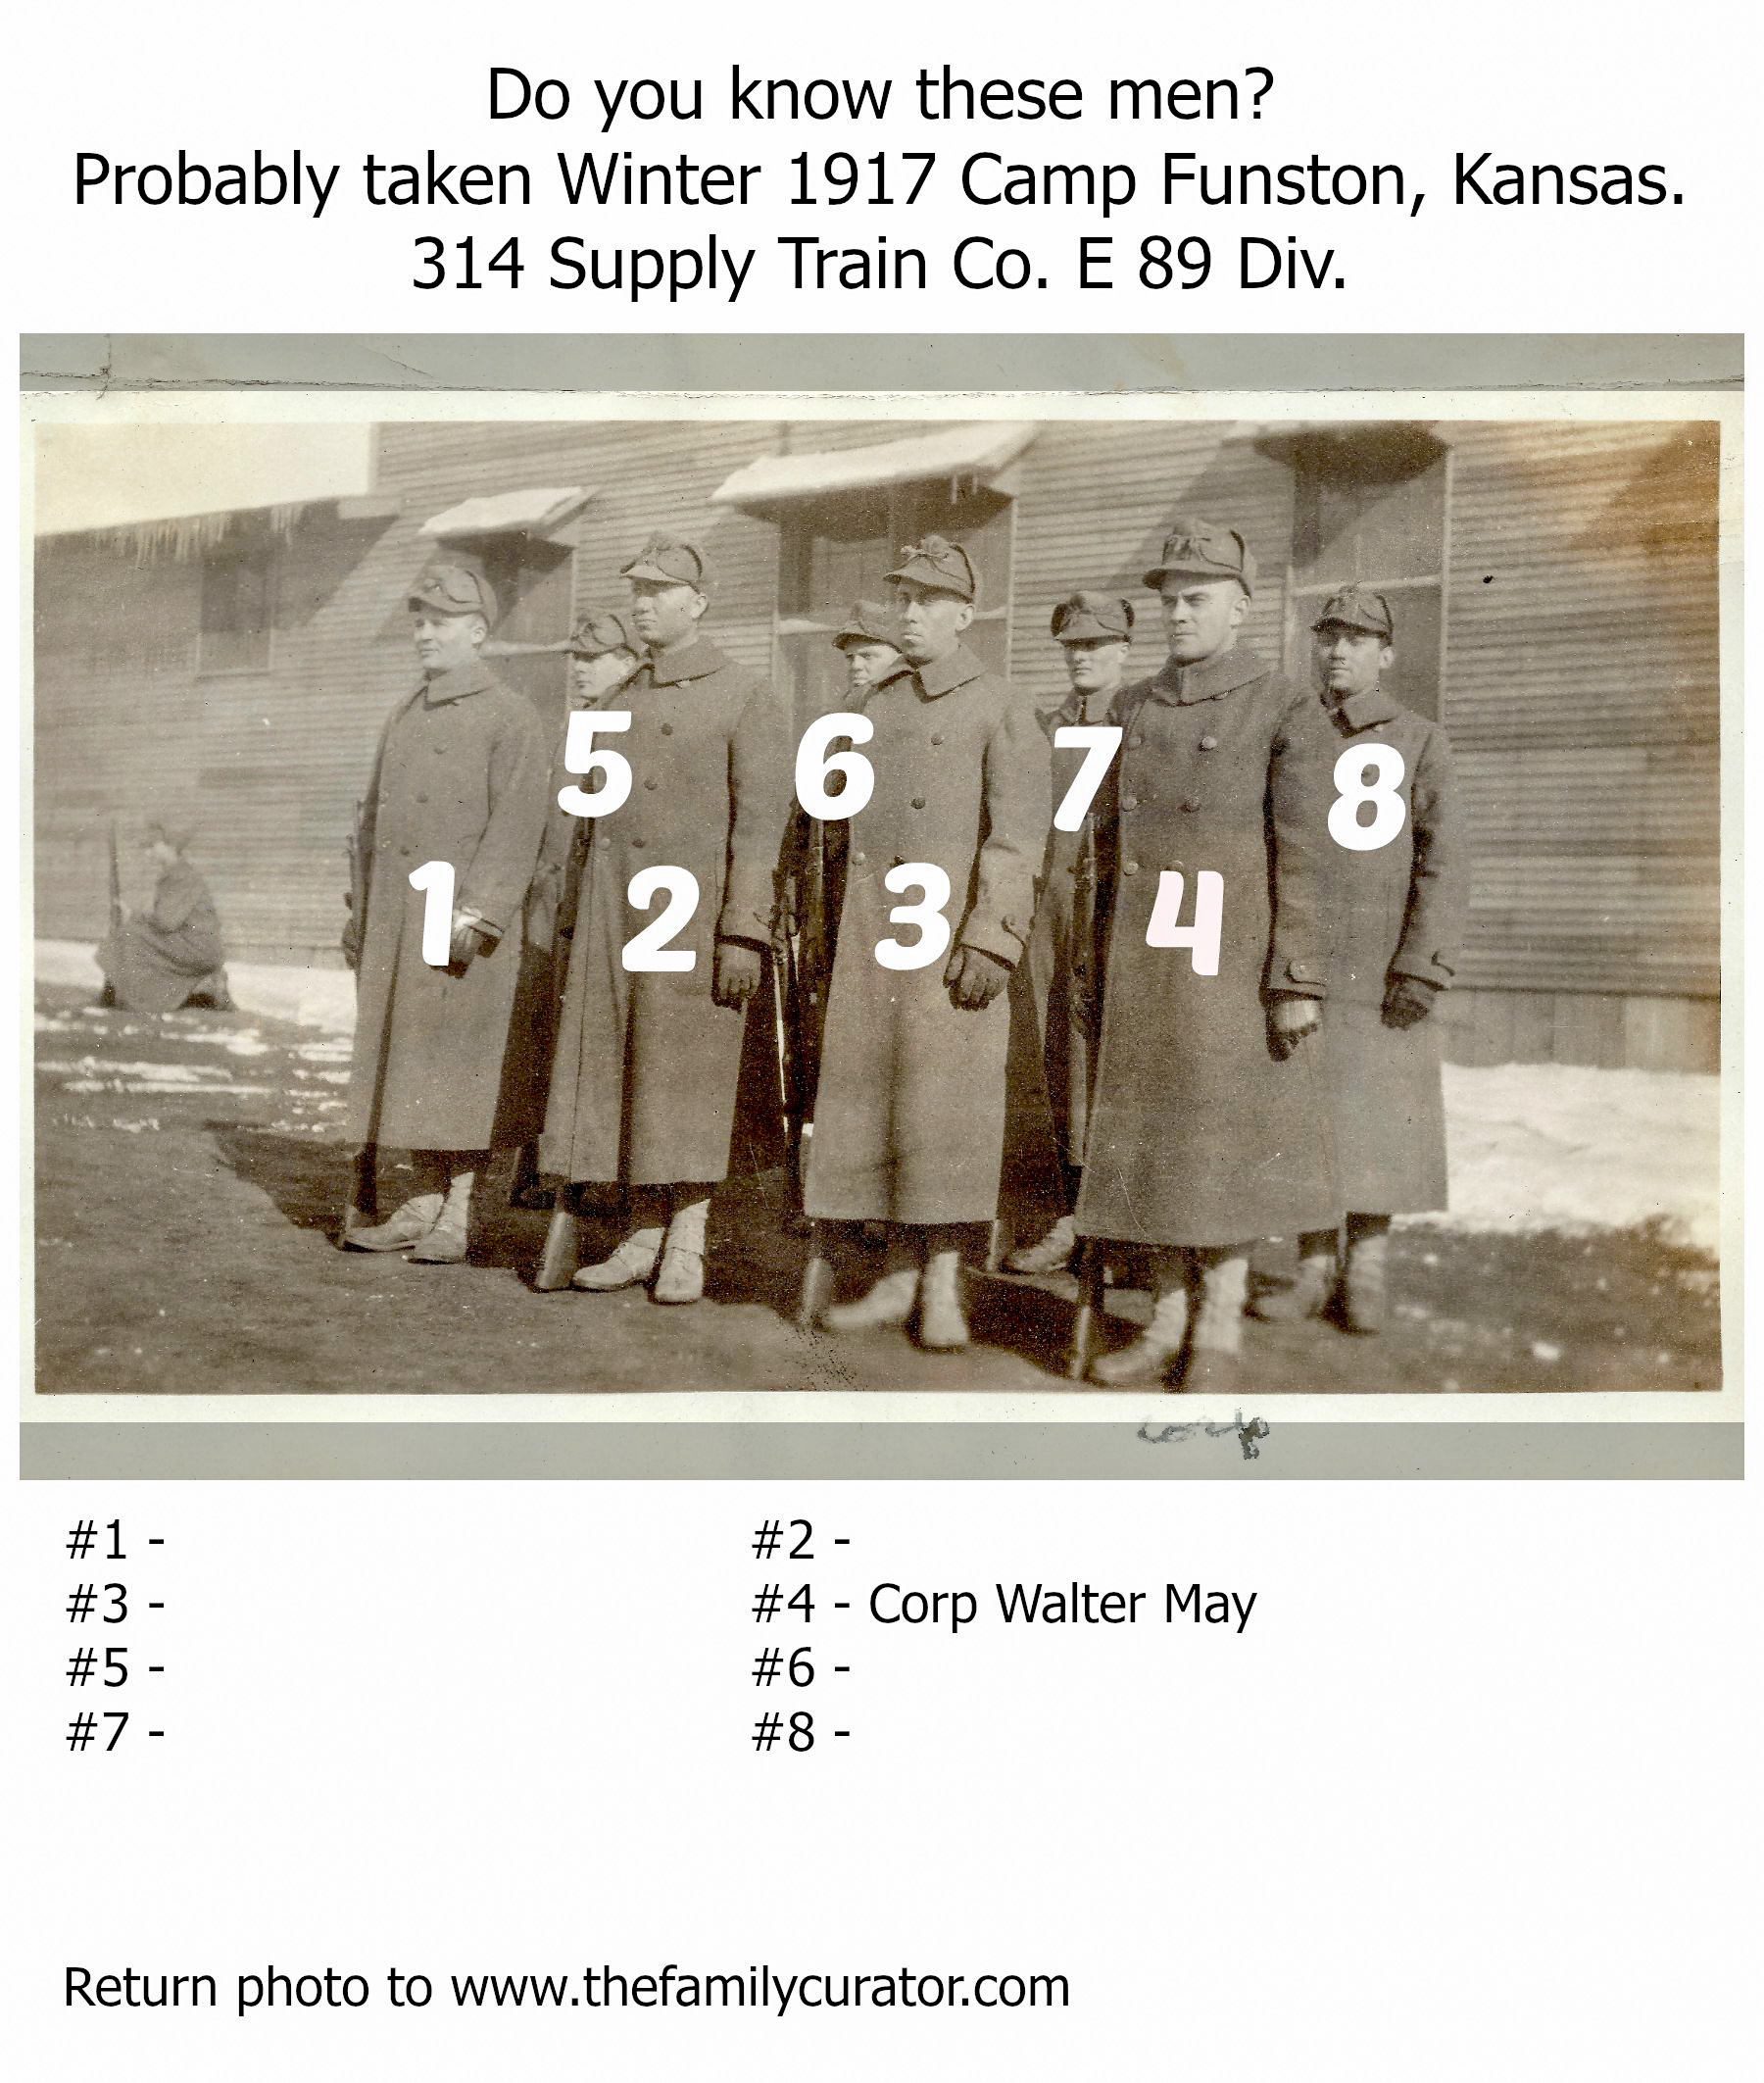
One old black photo album includes pages of farms and farmers alongside snapshots of happy couples picnicking and sober young men in army uniforms. A sepia snapshot shows “Corp.” Walter G. May with a group of men all standing at stern attention.
Notes in the photo album indicate that Walter was stationed at Camp Funston in Fort Riley, Kansas for basic training. I’ve learned that the camp was ground zero for the 1918 Great Pandemic that killed more people than any other disease in recorded history. Fortunately for our family, Walter’s unit, the 314th Motor Supply Train left Funston in June 1918 a few months ahead of the crises that began that autumn.
I wonder if any other men were from his hometown of Bennet, Nebraska, or if he kept in touch with them after the war. Who are these men?
I need a good, sharp digital image to share on public genealogy sites, and maybe – just, maybe – someone will spot their grandfather or uncle in the photo. To maximize my chances of success, I’ll need fast-loading web-resolution digital images, and print-quality images for anyone who might want a copy to print out for their own family research. It might also be helpful to offer a built in identification key and caption with the information I already know and my contact info. Here’s my plan for creating Group Photo Bait, designed to make it easy for people to identify people they know and respond with the information.
Digitizing Group Photos
Group photos often show small individual faces that can become grainy or blurry when scanned at a low resolution and then enlarged. In this example, I am using Adobe Photoshop Elements, a popular editing tool for both Windows and Mac computers. Here’s my step-by-step process:
1. Scan each image with these settings: 1600 dpi, color, JPG (or TIFF format)
I typically use TIFF, and make a final JPG copy to share. Use the format that suits your needs and equipment. This resolution should capture detail in the small faces of a group photo. If the faces are really tiny, I bump up the resolution to 2400.
2. Open the photo in or your photo editor. If the scan is in JPG format, make a copy of the JPG to edit.
Note: I use Adobe Photoshop Lightroom 6 for my photo management and basic editing. I recommend Picasa, Apple Photos, or Adobe Lightroom because these are all non-destructive editing programs. This means that any changes are written as instructions rather than actual changes to the file, so there’s no need to work on a copy of the TIFF file. If you use a photo editing program such as Adobe Photoshop Elements, make a copy of your newly scanned JPG images before proceeding. For more info on choosing and using a photo editor, see chapter three in my book, How to Archive Family Photos.
3. Crop the photo, deleting unnecessary background. You may want to leave the margins to include printed dates or handwritten notes. If you crop closely to show only the group, save the original uncropped version as well.
4. Apply color-restoration to faded or color damaged photos. Use the Auto Color function or tweak the brightness, contrast, and other sliders until the photo looks the way you want it. Use a light touch aiming to restore clarity rather than make the picture pixel-perfect.
5. Add a title, caption, and keywords. Depending on your photo editor, this could be called Information, Metadata, or Keywords. Include your email or website in the caption, along with as much information as you know.
6. Save as a JPG image 300 dpi. This will preserve a print-quality image for anyone who may want to print a copy and preserve a high-resolution photo for close examination on a computer screen or tablet.
7. Give your photo a meaningful filename. Use a surname, event, or location as part of the filename, and add “print” as a reminder of the quality, for example:
314th-camp-funston_1918-print.jpg
8. Next, create an identification key to help people viewing the photos.
(…and now a brief interlude about identification keys and photo captions).
Key vs. Caption
As a high school and college student I worked at our local town newspaper, filling in as reporter, photographer, proofreader, as needed. One of my jobs was to write photo captions, many photo captions. A caption is not a key. A caption presents information about the people, places, or events shown in a photograph. A key, however, is a kind of symbolic shorthand to identify people, places, or events.
Photos have captions, maps and charts use keys. And yes, there are exceptions. Before Mapquest and Google Maps we used paper road maps with little symbols to indicate Campgrounds, Churches, and Gas Stations.
Use a caption to share information about the people or events in the photo; use a key as a tool to identify individuals. If you are working with a large group photo with many individuals, you may need to use a key as part of the caption, but more on that in another post.
How to Write a Photo Caption
The standard method used to write a caption in print media lists names in individual rows, from left to right as you would read a line of print on a page. Using this standard format eliminates the need for sketches and numbers, and lets people know what to expect when they want to know more about the photo. Use this format for groups of more than two people:
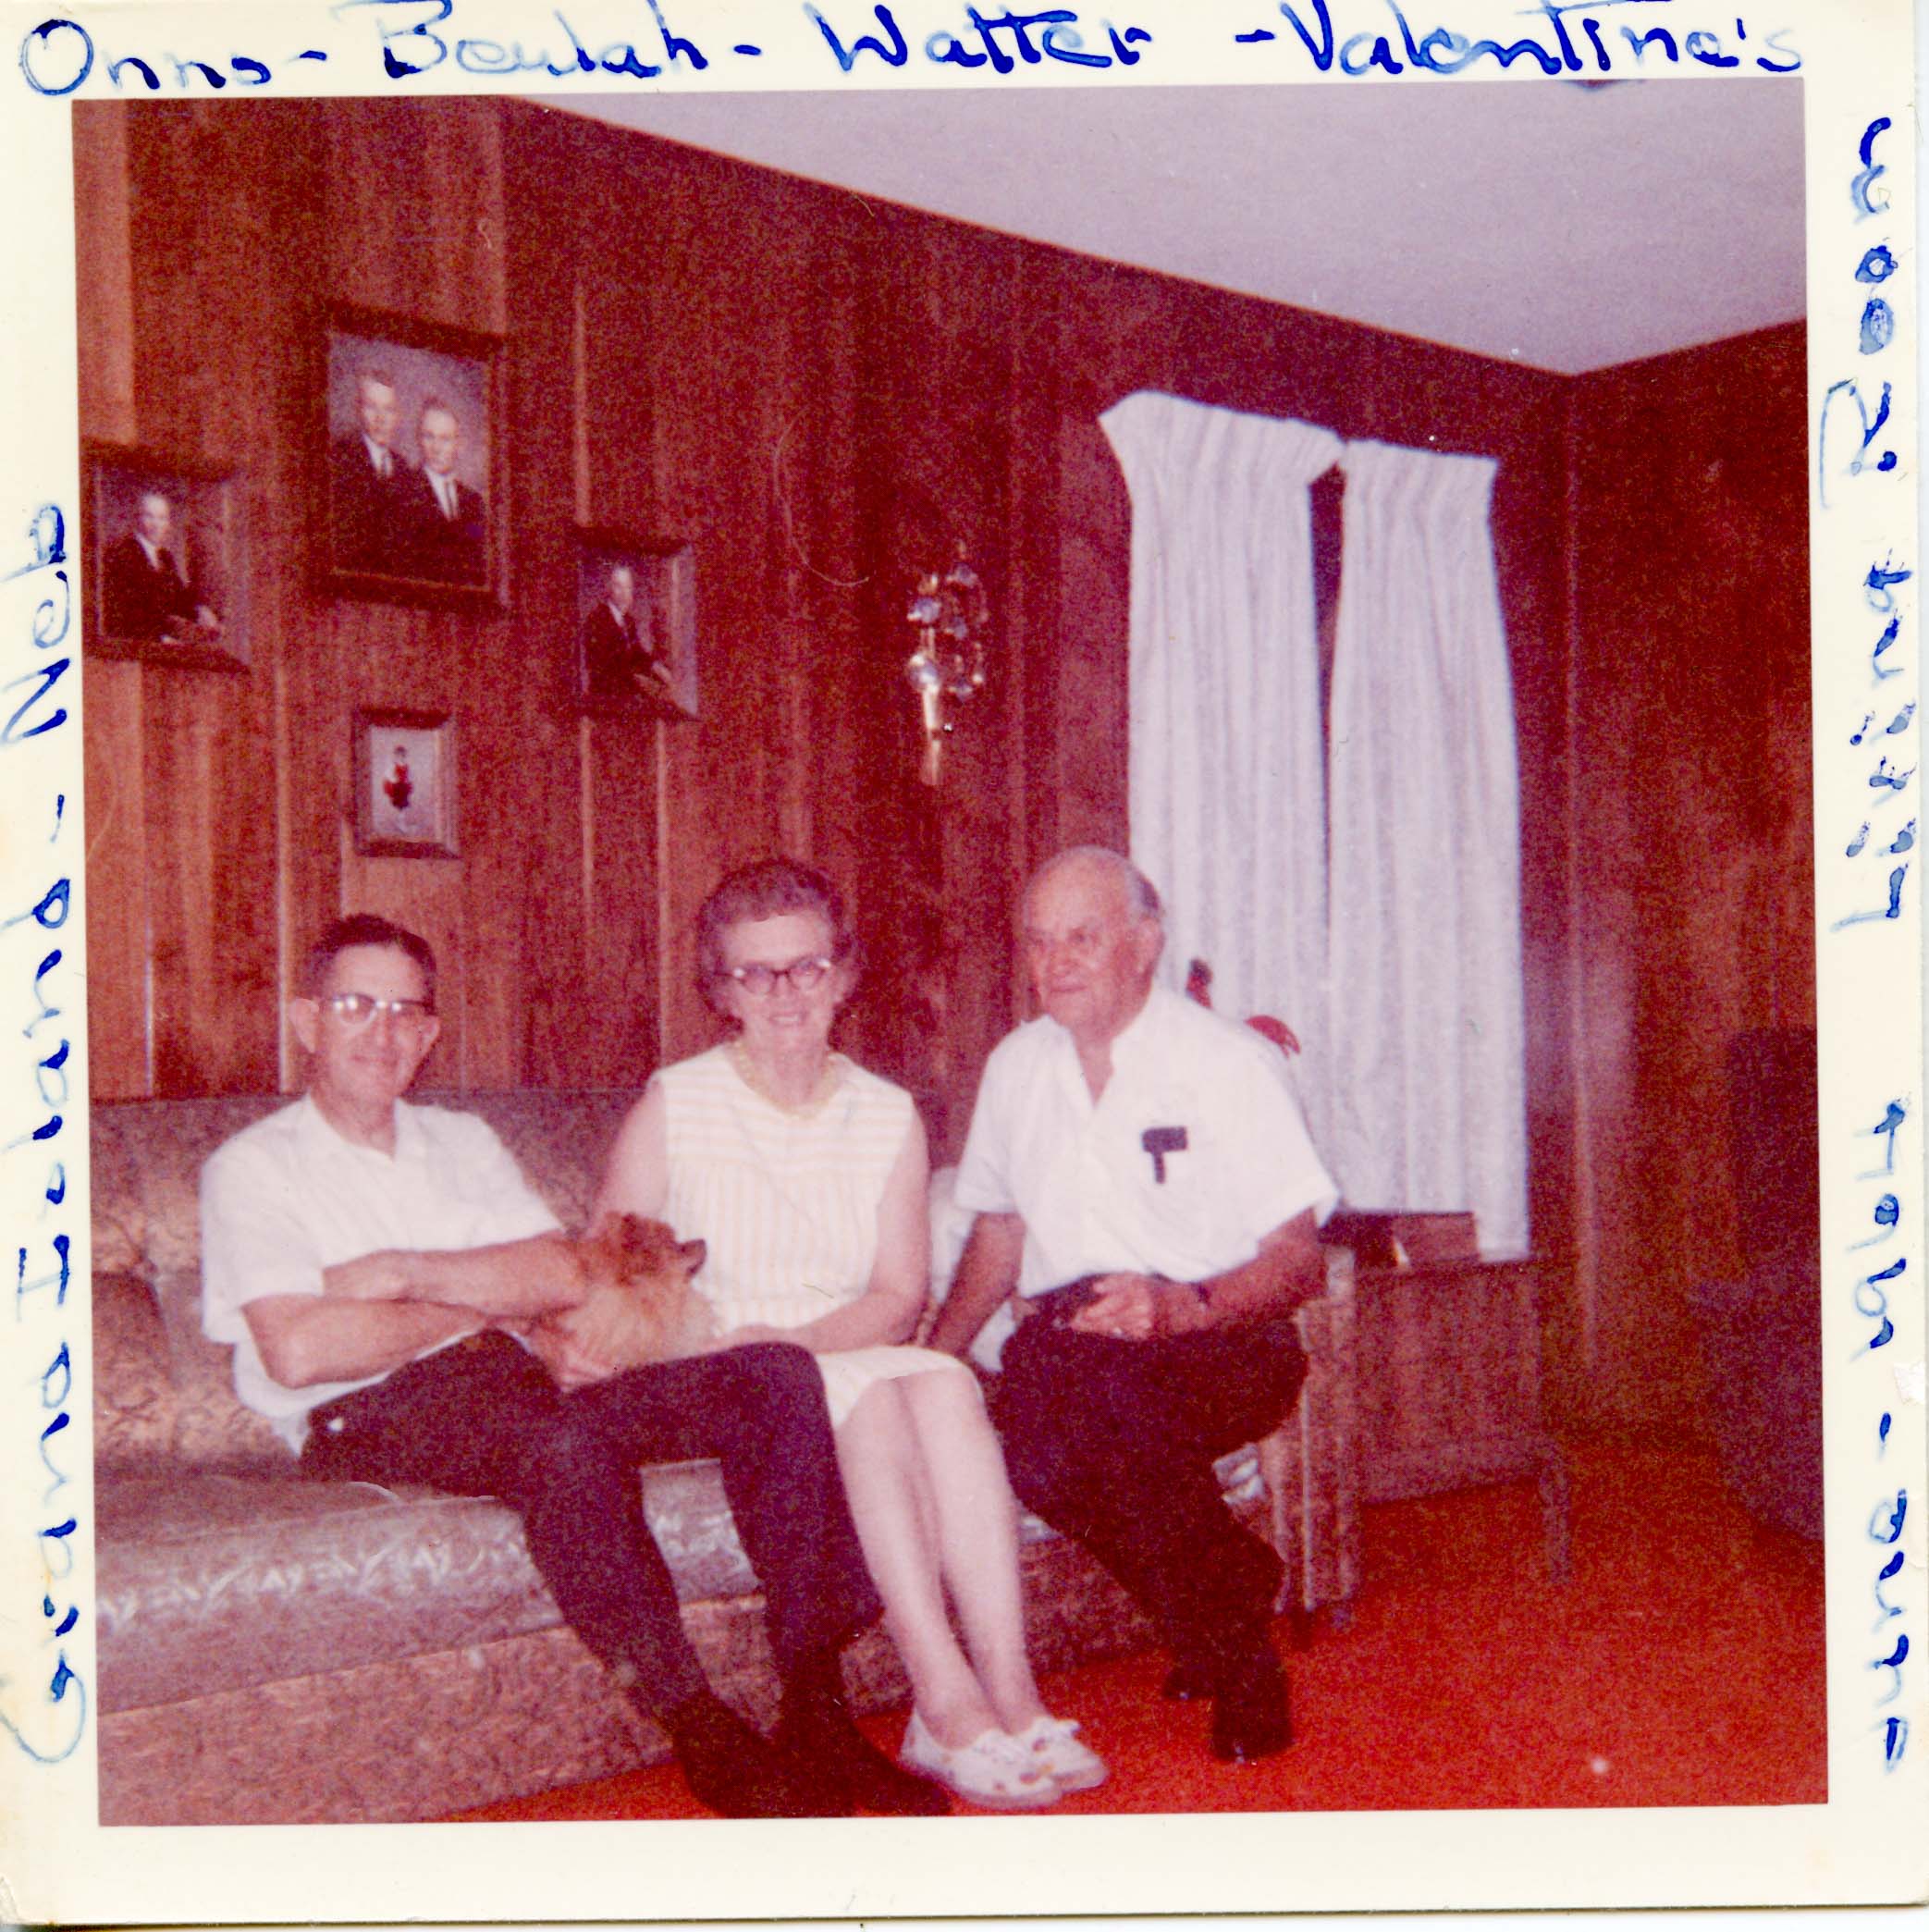
in Grand Island, Nebraska, June 1964. Seated in the Valentine
living room, from left: Onno, Beulah, and Walter.
When you have two people, names are listed as they appear in the photo from left to right.
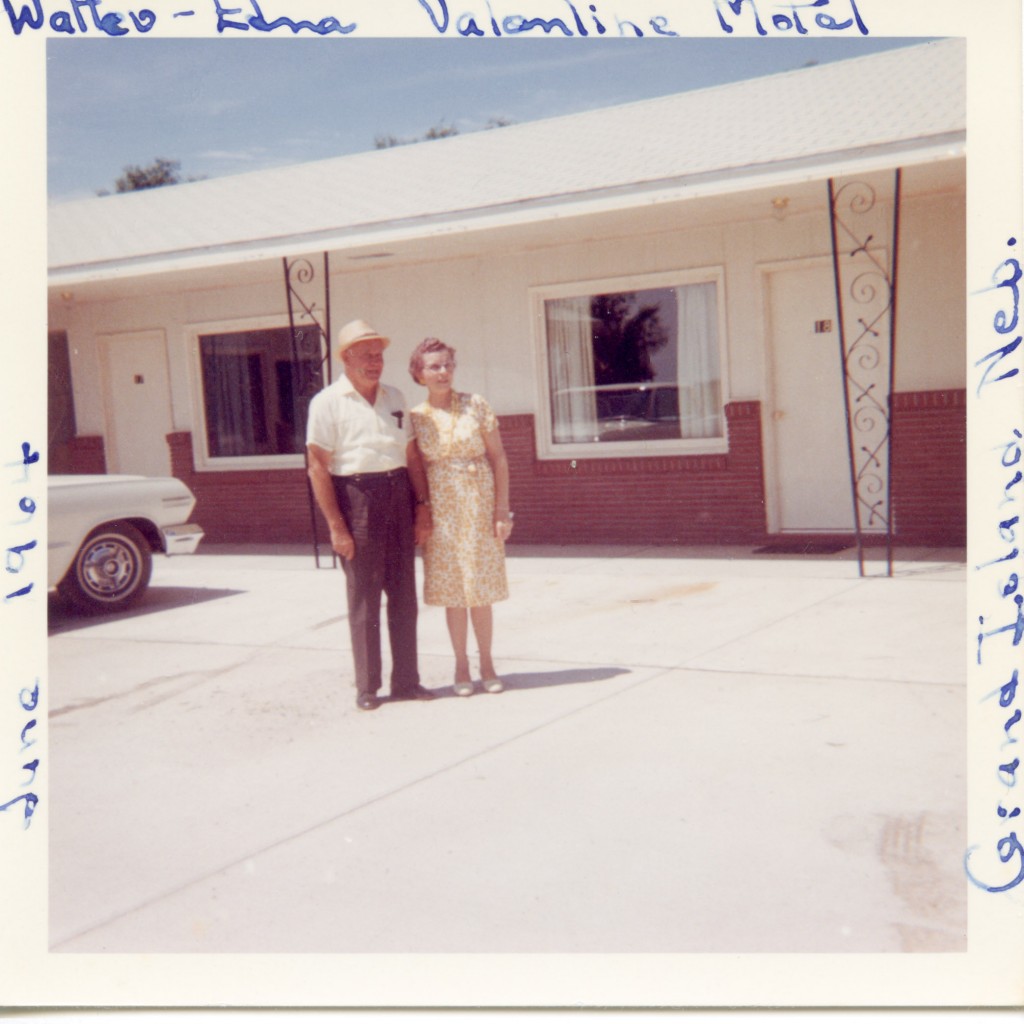
Grand Island, Nebraska, June 1964.
One Row or Two?
For a large group, use rows. Or, if the people are standing in rows but their heads appear in a relatively straight line, use an imaginary line as your base to establish a single row “from left.” Either of these examples works; use whichever seems more clear to the reader.
In this example, eight soldiers are shown in two distinct rows, but because their heads appear staggered creating one line, either of the following caption formats is fine:
Example of caption for two rows:
Soldiers at Camp Funston, about 1918 (from left): Front: Adams, Brown, Chester, Dixon; Back: Edwards, Finch, Golden, Higgins.
Example of caption using one row:
Soldiers at Camp Funston, about 1918 (from left): Adams, Edwards, Brown, Finch, Chester, Golden, Dixon, Higgins.
When to Use a Key
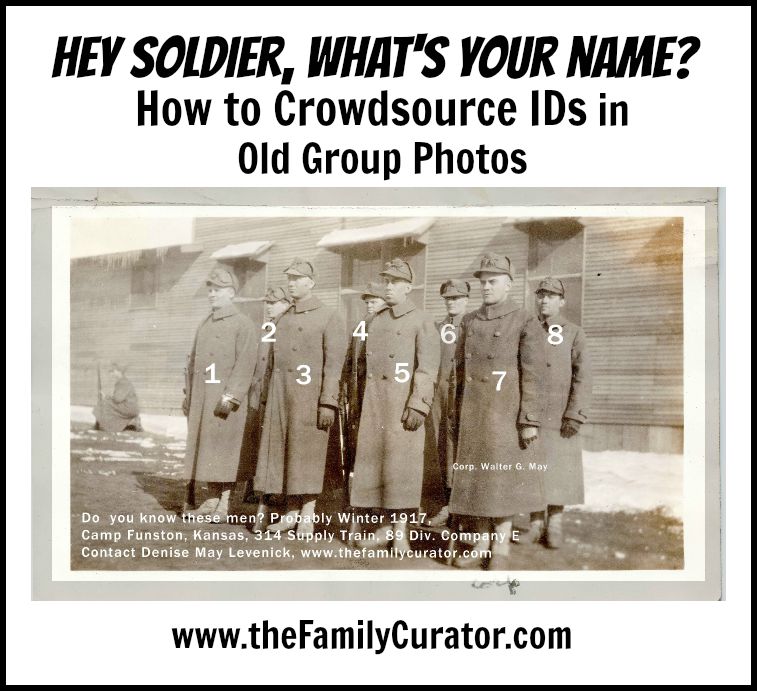
A map key or legend “unlocks” the code of symbols to help us understand the map. A key is also useful for labeling a group photo of unidentified people when the goal is to identify individuals. The Identification Key should be simple and intuitive. It should be so easy to use that anyone recognizing a person in the picture can respond with a minimum of effort.
The simplest Identification Key uses numbers with a corresponding list below the photo for names. Think of this as a fill-in-the-blanks form and add names as you learn new information.
Group Photo Numbering Tips
- Use numbers to identify individuals; one number per face.
- Do not number totally obscured faces, but if identification might be possible from a distinctive hat, hairstyle, or other feature do include the person in your number key.
- Avoid mixing names and numbers. It’s okay to add a name to a number, but don’t skip numbering someone because you know their name.
- If you are circulating several photos, use the same format for all photos, do not use rows in one photo and lines in another.
- To keep the identification with the photo, it’s a good idea to have a caption area above or below the picture with space for any information you know, the identification key, and your contact information.
(we now return to the Tutorial segment of this post)
9. Add caption, key, and contact information to the photo. There are many ways to add this information. Here are two possible methods:
1. Place your photo in a word processing document, type your caption or identifying information, and then save the document using SAVE AS: DOC or PDF. This is the file you will share with others.
2. Add the caption using a photo editor like Photoshop Elements or a free online editor like PicMonkey. In Photoshop Elements, create a new document and then place the photo leaving room for a caption. In PicMonkey, use the collage tool and adjust the size of the spaces to accommodate your text. I find it easiest to type my caption in a text editor and use cut-and-paste to place it in the photo editor. Add the numbers as text boxes and position for each person. I think it helps the viewer to see the number directly on the person’s chest, close to their face.
10. Use the Save AS or Export command to save the final file in JPG format which will be a smaller file size good for emailing and posting online. I’ve found that 90 dpi with a maximum file size of 500 K to 1500 K creates an adequate image for online viewing.
Finally, share your photo widely, anywhere potential researchers might spot your photo and be able to identify the individuals. Here are a few places to get started:
- Ancestry.com ancestor page for your ancestor
- Fold3 memorial page (you did create one for your ancestor?)
- Find a Grave
- WikiTree
- FamilySearch
- Your blog or website
- Facebook – your page, society page, military page, club page, etc.
- My Heritage
- Mocavo
- Dead Fred
You don’t have to add your photo everywhere at once. In fact, it’s not a bad idea to keep the file active and add notes or new links frequently.
Veteran genealogists will tell you that it can take some time to reap the rewards from “cousin bait” but you never know when you might catch “the big one.”
If you have questions about working with old group photos, please leave a note in the comments to this post. You’ll find more ideas and step-by-step tutorials in my new book How to Archive Family Photos: A Step-by-Step Guide to Organize and Share Your Photos Digitally including:
- scanner settings
- digital filenaming and file organization
- working with file formats
- choosing and using photo editors
- creating projects with the free online editor PicMonkey
Photos of large groups need creative solutions to design an Identification Key and captions. Stay tuned for more on this subject, and please leave a comment if you have a method you’ve found to be successful.
Read more about working with unidentified group photos in “How Bad Photos Can Make Good Genealogy”at the Ancestry.com Blog.
Note: This website uses Affiliate links. When you use the book and software affiliate links in this post for your purchase, you help TheFamilyCurator.com stay online and it doesn’t cost you a penny more. Thanks for your support!




Denise,
I want to let you know that two of your blog posts are listed in today’s Fab Finds post at http://janasgenealogyandfamilyhistory.blogspot.com/2015/11/follow-friday-fab-finds-for-november-13.html
Have a great weekend!
Thank you so much, Jana! It’s an honor to be included on your weekly list!