My handwriting has changed dramatically over the years, and I don’t just mean from block letter printing to Palmer-style cursive writing. Long hours at the keyboard have made it difficult to hold a pen such that most times I much prefer typing to writing. Maybe that’s why I love looking at old handwriting. Even bad old handwriting.
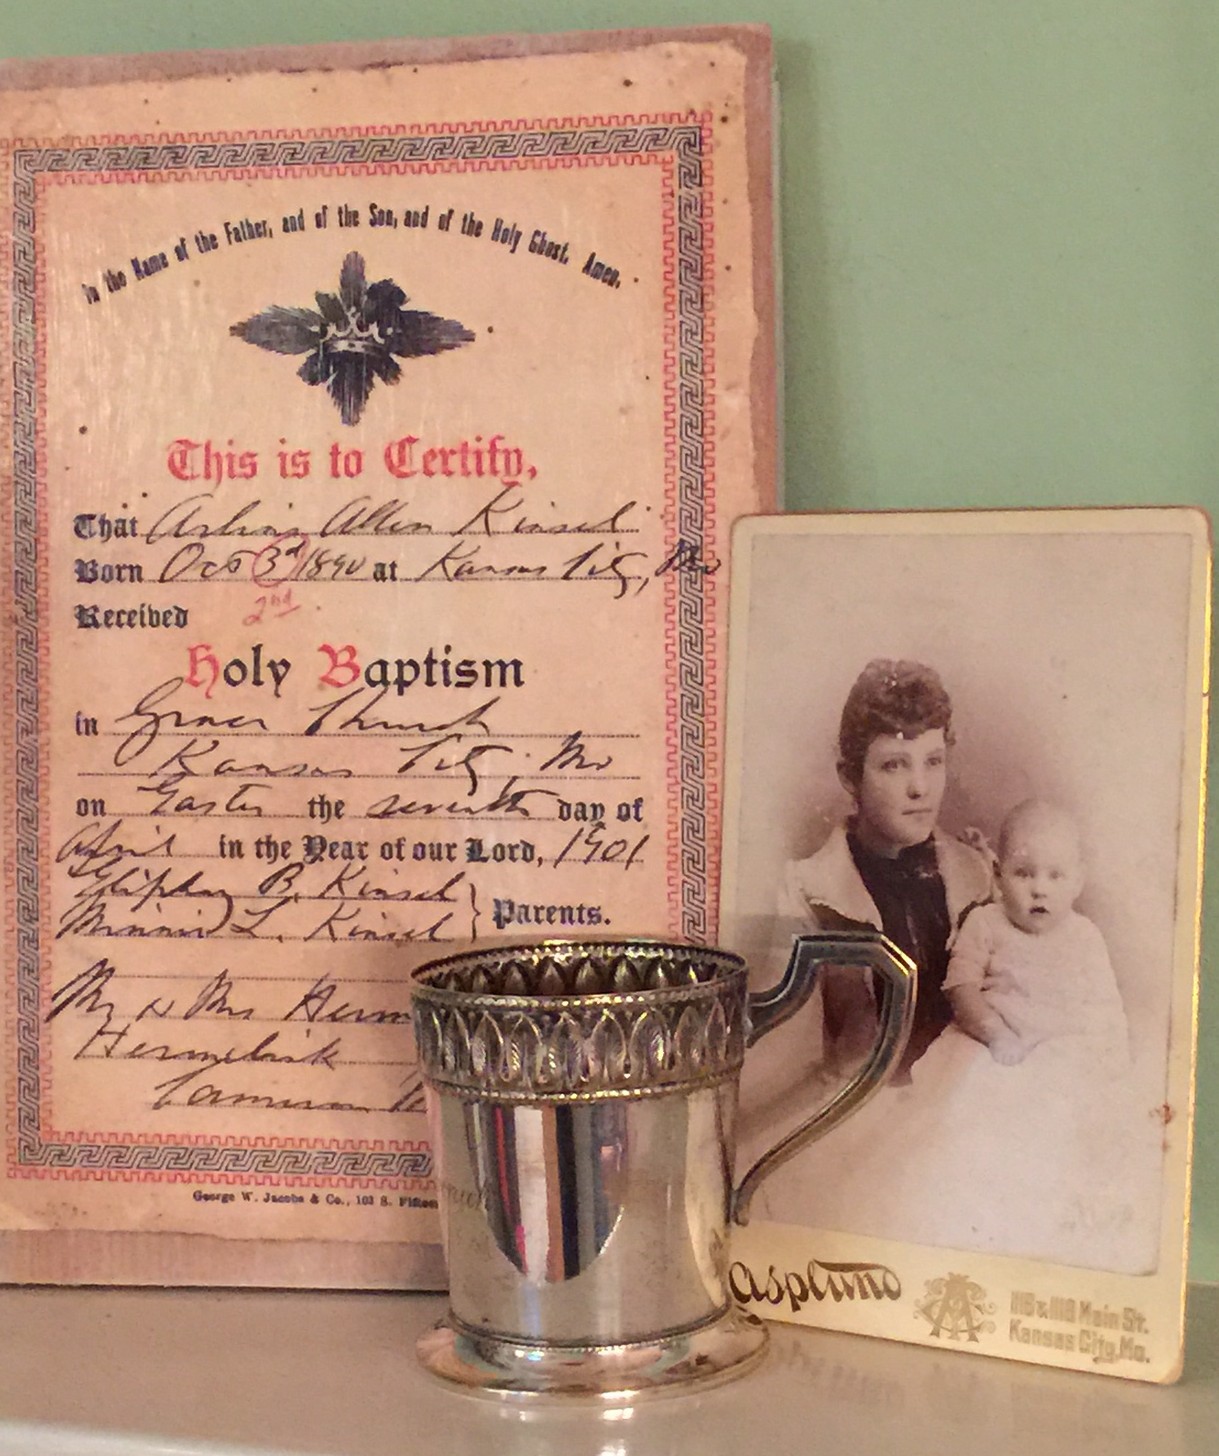
My grandmother Arline’s baptismal certificate certainly isn’t an example of lovely penmanship. It seems to be a hastily completed form, signed by the pastor, incorrect birthdate notwithstanding. “Someone,” I’m guessing either mother Minnie L. Kinsel or my grandmother herself, corrected the date in red ink and noted the mistake with a circle. As Dr. Thomas Jones so often notes, however, “Does it matter?” And “No, it doesn’t.” Whether Arline was born October 2nd or 3rd is not important. The year, the place, and the parents — now, this information is important.
I like this document because it reminds me not only of Grandma Arline, but because it reminds me to stay focused on the things that do matter, and to avoid the distraction of minutia.
The original baptismal certificate measures about 5 x 7-inches and is a pre-printed card. It is the earliest documentation of Arline’s birth I’ve been able to locate. As such, I don’t want to display the fragile original behind a frame or expose it to the elements in my home office. Instead, I created a wooden plaque that I can display in direct sunlight without fear of damage to an heirloom.
Step-by-Step Project Instructions:
1. Scan the original
Using my Epson Perfection Flatbed Scanner, I scanned the original certificate at 600 dpi in TIFF format, full color. The orange color-cast is a true representation of the discoloration that has occurred over time.
2. Resize as desired and print
My photo software easily prints from TIFF or JPG images, but I could have converted to JPG for printing if needed. I printed to fill a letter-size sheet of paper, which fit the 7 x 10.5 wooden board I wanted to use.
For decoupage, I wanted a lightweight paper that would accept a true-color print — regular inkjet copy paper worked well.
3. Prepare the wooden plaque
I prepared the wooden board my sanding the surface and edges smooth and then painting with a diluted coat of white latex paint (leftover from a recent home decorating project).
4. Decoupage the print to wood
When the board was dry, I added a coat of Mod Podge Matte-Mat decoupage glue using a foam brush, smoothed the paper baptism print on top of the goo, and then applied another coat of Mod Podge. I worked slowly and carefully to get the paper (mostly) smooth. When the plaque was dry, I added a final coat.
Find more photo project ideas in 25 Easy Keepsake Projects featured in How to Archive Family Photos.


