Before you start snapping photos with your DSLR or compact digital camera this holiday season, confirm that your camera settings are updated to Standard Time. Stand-alone cameras aren’t like a smartphone with auto-updating clocks, and it’s easy to forget forget to change our camera clocks or to accidentally advance the date or year when changing the hour.
If photos imported from your digital camera are MIA, the camera clock may need to be reset.
Setting your digital camera with the correct date and time is the simplest and most effective organizational strategy for controlling digital photo chaos. Your computer automatically organizes photos by the date and time embedded in each file by the camera. If the date or time is incorrect, you’ll be viewing Thanksgiving photos at Easter time. While you’re inside the camera Settings Menu, check your other settings to confirm they are set for your preferences.
Here’s How to Update Your Camera Settings
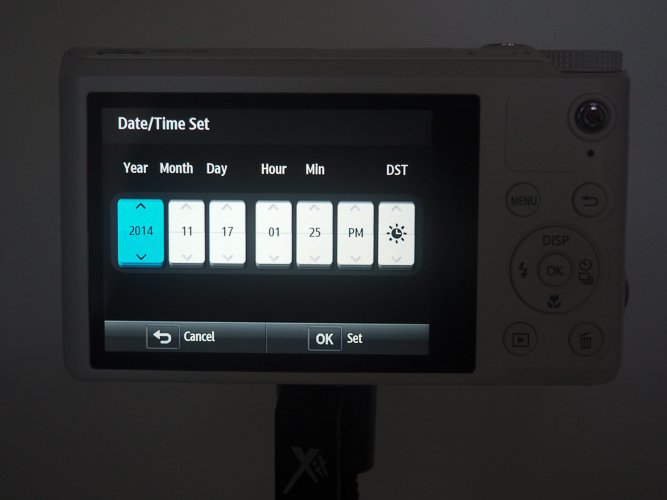
Your camera menu may look different from this image, look for the MENU option and select SETTINGS to find DATE AND TIME and other settings. Use the navigation arrows to set the correct information.

Get Your Camera Ready for Holiday Snapshots
1. Set the Date and Time
One of the first steps with any new camera or smartphone should be to set the correct date and time, and confirm other settings are correct. It’s easy to mistakenly advance the year when adjusting for Daylight Savings Time.
Make it a habit to change your camera clock when you adjust your household clocks for Daylight Savings Time.
2. Confirm Continuous File Numbering
Some cameras offer the option to reset file numbers. Be careful with this; checking this option may give you duplicate numbers and create havoc in your organizing system. Opt for continuous file numbering from one memory card to the next to avoid confusion and conflicts.
3. File Format
If you use a DSLR camera you will have the option to shoot RAW, RAW+JPG, or JPG. RAW files take up considerably more room but are the camera equivalent of TIFF files, stable and uncompressed. However, RAW files need to be “processed.” Most family photographers stick with JPG. If you’re worried about JPG compression and image loss, consider working with a non-destructive photo editor such as Adobe Lightroom or Picasa.
4. Resolution
Most cameras also have an option to set the resolution from maximum megapixels to smaller sizes. Don’t you want the best image possible? Keep this set at maximum. Purchase larger memory cards if needed to accommodate more photos on a long vacation or research trip.
5. Photographer and Copyright
Some cameras now offer an option for the photographer to include a name and copyright information. Personalize these settings if you like to shoot photos and post directly to social media via in-camera wi-fi or after transferring to your smartphone.
Don’t Let Your Photos Go AWOL
Although you may use your smartphone or tablet for picture-taking more frequently than a stand-alone digital camera, consider keeping your camera ready to go with fresh batteries and an empty memory card. Using a smartphone for hundreds of research documents can quickly drain the device batteries. If you use a dedicated camera, you’ll be able to use your smartphone to make phone calls and your shopping list.
You’ll find step-by-step instructions with photos for this task and many other digital imaging basics in How to Archive Family Photos: A Step-by-Step Guide to Organize and Share Your Photos Digitally (Family Tree Books, 2015).


