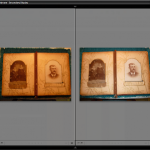
Last week in this column, I wrote about the scanning procedure in Setting Up a Genealogy Photo Workflow, Part 1. This week, we tackle Part 2, where we move the photographs to a photo organizer/editor.
After scanning my photographs and storing the images on my external MyBook hard drive (Western Digital), I turn to Part 2 of my Photo Workflow.
Importing Images to a Photo Organizer/Editor:
Note: TIFF Images are stored on an external hard drive.
1. Connect hard drive to desktop computer.
2. Open Adobe Lightroom2, Import photos, with settings to retain file names.
3. After import, tag photos with useful keywords, location, names of subjects, place, date.
4. Rename files with descriptive file name prior to original scan filename. For example: aak-001 becomes
kinsel-arline_1912_ portait_aak-002
I use a hyphen to separate names and placenames and an underscore to separate categories, thus name_year_description/place_original file name4. Convert files as JPG and store on C Drive of Desktop computer.
5. Back up file on second MyBook hard drive.
6. After tagging, converting, and backing up, TIFF files are never touched! All edits are made to jpg files. In Adobe Lightroom, all edits are “nondestructive” meaning you can return to the original without loss of data. Files may be resized, emailed, cropped, etc. all without damage to the original image file.
Other photo editing software can do a similar job with tagging, renaming, and converting from TIFF to jpg. Adobe Photoshop Elements is a great program and easy to learn and use; Apple iPhoto or Adobe Photoshop Elements for Mac does the job for Mac users. But, to the best of my knowledge, Adobe Lightroom2 is the only software that offers “nondestructive” editing. If you use a program that records changes on the original file, it is wise to always work from a copy, and save an archived original.
With my originals safely archived on MyBook (#1), and backed up to MyBook (#2), I am comfortable editing and working with the jpg images on my hard drive. Next step, printing a contact sheet and 4 x 6 prints from a local warehouse store to use as reference.


Hi Denise,
I realize this post was written nearly seven years ago and was likely absolutely correct at the time. However, within the last year or so, ACDSee Ultimate 10 was introduced to the Windows world. Like Lightroom, it also offers non-destructive editing and some pros have switched from Lightroom to ACDSee, partly because, unlike LR, it does not keep the metadata trapped in a proprietary database. There is an ACDSee database, which users can use to add metadata, but that metadata can also be written to suitable file formats or, for other formats like the various camera RAW and DNG formats, to ‘sidecar’ files.
One of the benefits of using VueScan Pro, as you probably realize, is the option to save DNG format files, along with TIF, JPG, and PDF, in any combination, using only one scanner pass per image. Like a camera RAW format, the DNG format is read-only, intentionally on the part of its creator, Adobe. In effect, this means that any program, such as Photoshop, Photoshop Elements, Lightroom, ACDSee Pro and ACDSee Ultimate, among others, that can process a digital camera’s RAW files in Adobe Camera Raw, can edit both the various flavors of camera RAW files and DNG files non-destructively. Since the DNG format is designed to capture and save all of the data the hardware (scanner and computer) can produce, there is absolutely no image processing done to the digital data by the scanner or the computer. As I understand it, there is at least some processing done even when an image is scanned as TIF, although nowhere near as much processing as is done for JPGs. To maximize the scanning workflow, VueScan Pro lets the user save the DNG file to disk for later processing instead of needing to scan, process, scan next image, process, scan, etc.
Jeff Schewe’s book “The Digital Negative” , PeachPit Press, 2013, is an excellent source of information about Digital Negatives in general and Adobe’s Digital NeGative format in particular, especially in relation to Adobe Camera Raw, (ACR), Photoshop, and Lightroom.
Sasha Steinhoff’s “The VueScan Bible” and “Scanning Negatives and Slides”, both by Rocky Nook, are two additional valuable resources, especially for those using VueScan for scanning slides or negatives.
I’ve found all three books to be excellent investments for their valuable information.
Art
Hello Art, The digital photo world changes at the speed of a super-fast shutter click! Thank you for your notes about VueScan Pro and ACDSee. I started using Lightroom about 2007 and was especially happy to find a cross-platform program with a active user base. There has been considerable controversy among Lightroom users about DNG files, and I have continued to recommend (and personally use) the standard archival protocol which uses TIFF format. It sounds like you’ve customized a workflow that works for you… and that’s what it’s all about. Thanks for sharing your insight and the helpful resources for further reading.