
Professional photographers call it a “workflow,” but it’s really just a “routine.” It’s the standard order of doing things that results in getting things done. Routines work. You don’t have to use Adobe Lightroom or any particular photo organizing or editing software to get the benefit of a genealogy scanning workflow. Whether you use Photoshop Elements, XnView, iPhoto, Picasa, or Flickr to organize and store your photos, a consistent procedure for scanning, file naming, tagging, and editing will make your photo work run smoother and faster.
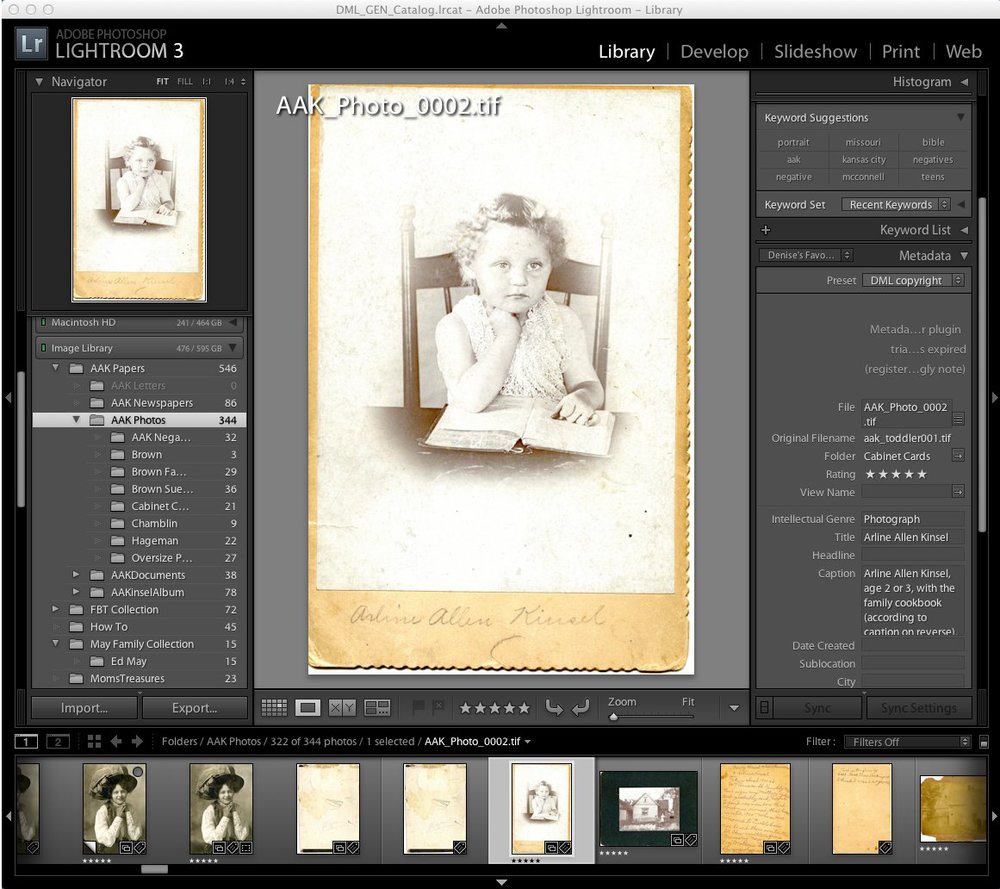
A photography workflow can help a genealogist or family historian process a photo collection efficiently and carefully. I first wrote about my Genealogy Photo Workflow in 2009 when I was using the photo management software Adobe Lightroom2. The program is now up to version 4, although I continue to use Lightroom3. It looks like Lightroom version 4 has some great new features, but haven’t felt to try them out… yet.
My Genealogy Photo Workflow
After a few years and considerable trial and error, I’ve tweaked my original photo workflow a bit, but it remains essentially the same as it was in 2009. I’ve come up with a photo workflow that continues to work well for me. . . today, at any rate.
I have broken the workflow into separate activities; this works for me because I can process the photos in smaller chunks of time. I can scan or import depending on the time available, and still make progress toward completing the project.
Supplies and Equipment Needed —
computer
flatbed scanner, (Epson Perfection V500)
2 external hard drives, (MyBook)
photographs
white cotton gloves
archival drop-front box 12 x 15-inch (for oversize photos)
archival flip-top box 8 x 5-inch
archival sleeves, 5 x 7-inch and 8 x 10-inch
permanent ink pen, archival safe
Adobe Lightroom 3 software
Part 1: Scanning Workflow
Set up —
1. Connect and turn on scanner to warm up
2. Connect external hard drives to computer
3. Put on gloves
4. Clean scanner glass with soft cloth
5. Start scanner software: set for color scan, TIFF format, sent to folder on my Desktop named Scans, file name + sequential image number; check option to open folder after scanning [this is my confirmation that I have completed the scan]
Note: for file name, I use a general name for my current archive [aak] plus the next number in my series [045]. I will edit names in Lightroom when I add metadata.
Scanning —
Note: I scan both sides of every photo, front first, then back [thanks for that tip, footnoteMaven!].
- Set resolution, TIFF file format
I use 600 dpi for photos (1200 dpi for photos needing restoration or images that are very small), 300 dpi for documents
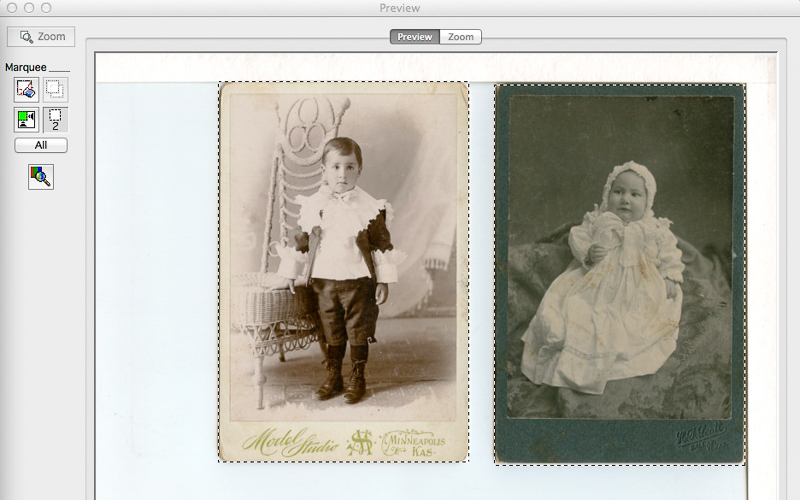
- Preview Scan front side of image; rotate image on Preview panel if needed
- Scan; folder will open showing new file image with name of filename-number [aak-045]
- Turn photo to reverse side and Scan; folder will open showing new file image with name of filename-number [aak-046]. Notice that front sides of photos are odd numbers, reverse sides are consecutive even numbers.
- Remove photo from scanner, place in archival sleeve and set in box lid [will be used later]
- Repeat for each photo; I usually scan in batches of 20-25.
This is a good place to stop working and tidy the work area. I’m not finished with the original photos, so they remain in the box temporarily. The next part of the workflow is to Import photos to Lightroom for tagging and jpg conversion. Stay tuned for Part 2 of Streamlined Scanning with a Genealogy Photo Workflow coming next week.
Blogger Michelle Goodrum at The Turning of Generations wrote about using a similar workflow for her project to digitize her father’s early correspondence, Letter Scanning Work Flow.
Why Lightroom?
In my years as a computer-user I have worked with many different photo editing and organizing programs on both PC and Mac computers. I’ve gone back and forth between PC and Mac a few times, so one of my “requirements” has been to select cross-platform software. I typically purchase a medium-speed computer, not something with a super-fast gaming processor, so my second “requirement” is a program that isn’t a big memory hog.
I was an early user of Adobe Photoshop Elements and used the tagging feature extensively with my genealogy photo scanning projects. However, when I started working with huge TIFF and PDF files, I found PE running slower and slower and slower. At the time, PE did not play nice with TIFF files so I had to use another program to manage these files. I found XnView, a cross-platform, free program that handled all kinds of file formats and managed batch renaming, file conversion, resizing, etc. in an easy and intuitive interface. I used both software programs for a few years, generally preferring XnView for management tasks and PE for photo restoration.
In 2007, I was intrigued by the buzz about Adobe’s new professional photo management program, Photoshop Lightroom 2. I attended a Scott Kelby Lightroom Workshop and came away ready to get to work. Lightroom is powerful, yet simple. In my opinion, it’s aimed for pros who would rather be shooting photographs than managing files. It suits me very well, and I am happy with my current setup.
One of my favorite features in Lightroom is non-destructive editing — any changes are made to the file instructions rather than to the original file itself. You can always go back to the original. Lightroom expert David Marx explains this well: Photoshop and Elements save changes to the original, Lightroom “builds simulations.”
I continue to use Photoshop Elements for design and editing work because I like the layers feature As PE has matured through various versions, it has become friendlier to other file formats, too. If I were starting out with a new program right now AND had a smaller image archive project, I would probably seriously consider using only one program. But, for my current purposes, the combination of Adobe Lightroom and Adobe Photoshop Elements work very well together.
Learn more about digitizing your family keepsakes and your genealogy papers in my new book, How to Archive Family Keepsakes. Special Offers now available from Family Tree Books, regularly priced $24.99, now $15.49, and save an additional 10%. Click here for info.
You might also like — Using Adobe Lightroom to Manage Genealogy Images
Revised and Updated, from an article originally published 21 July 2009 Tech Tuesday — Setting Up a Genealogy Photo Workflow, Part 1

Thanks Brian, for sharing this tip. That's an easy formula to use. I've hesitated to give too much math, because it gets confusing, but this is a simple solution!
Great article. Here's my two cents:
I work in an archive and scan quite a lot (including my own). For resolution of documents we also use 300 dpi, but for photos we use the formula of 5000 divided by the longest dimension in inches, with a minimum of 600 dpi.
Workflow/checklists/routines – I use Checkvist at https://checkvist.com/ for such as backups, genealogical sources to check, responding to family history enquiries; infact, anything that needs a tick-off checklist. You can use it online or as a printout (woodman, spare that tree!) and, for the home user, its free. Yes, that's FREE!
If you're into mindmaps, it can also import and export into various formats.
Usual disclaimers – hope this helps.
Tom