 Each Wednesday for the next four weeks I’ll post a tutorial and instructions to help you turn a stack of old family photos into a family history photo book using the techniques in my book, How to Archive Family Photos.
If you already own the book, take a minute to download the free BONUS Template Workbook of typeable, printable PDF forms for your own use (find the url in the book’s Appendix).
Single forms used in the Scan Along will be available as a free download with the weekly tutorial.
There’s no set “class” for this special event, and it doesn’t cost anything to join as we plan scan, and create. You will need old photos, some basic equipment, and a few hours each week to create a ready-to-publish family history photo book.
Project Overview
Objective: To create and publish a 20-30 page family history photo book in digital or print format.
For this project you will need:
- Old family photos: 20-40
- Digitizing device: scanner, OR digital camera or smartphone camera
- Computer: Windows or Mac
- Back up storage: external hard drive recommended
- Microfiber cloths for cleaning photos and scanner
- Gloves: white cotton or latex (or wash your hands often and hold photos only by the edges!)
Recommended:
- How to Archive Family Photos: A Step-by-Step Guide to Organize and Share Your Photos Digitally
- Tripod and remote shutter release for digitizing with smartphone
- Acid-free, archival storage containers for your photos
- Optional, recommended, resources and pay-per-view webinars
See the Toolbox page for equipment reviews and recommendations; and more products in The Family Curator Shop.
Thank you for supporting the Genealogy Scan Along by shopping with my affiliate links. It doesn’t cost you anything more and helps support this website.
What This Project Is All About
This Scan Along project will help you go from a stack of old photos to a family history book.
If you have a large photo collection, you may want to start scanning everything right away and gain some level of control over your inherited or personal photo collection. That’s understandable; I felt that way too when I inherited my grandmother’s trunk filled with old photos, papers, and keepsakes. I started scanning and then discovered that the project was larger than I anticipated. I had new questions every step of the way and had to redo much of my work.
Now, after several years and more than a few false starts I am actually making progress in archiving this very large collection. One lesson learned was to start small and refine the process before jumping in with both feet. The Genealogy Scan Along photo book project is designed to help you do the same.
I believe that when we master a small manageable project we are better prepared to move forward on larger digitizing and archiving projects. I encourage you to join us, and stay focused on this very do-able photo archiving project. The confidence and skills gained will be valuable assets for working with larger family history photo projects.
Get Started:
Create a Family History Photo Book
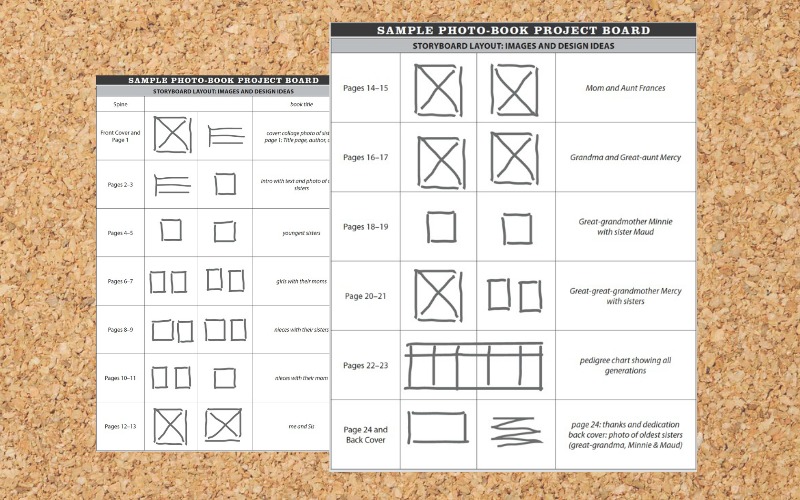
Organize your photo book ideas and storyboard the layout using the free Photo Book Project Board available HERE: Photo Project Board – Levenick.
 Step 1: Select a tentative theme and title
What kind of photo book do you want to make?
What kind of photos do you have?
You may already have a subject and theme in mind, especially if you own a discrete set of photos, such as your grandparents’ honeymoon snapshots or a collection of family reunion photos. Your task will be tougher if you have a huge photo collection; you have to narrow your choices to a focused and specific theme.
Write down one or two sentences that explain the purpose of your book and propose a few possible titles.
Here are a few ideas:
Grandpa’s War: A Nebraska Farm Boy in The Great War.
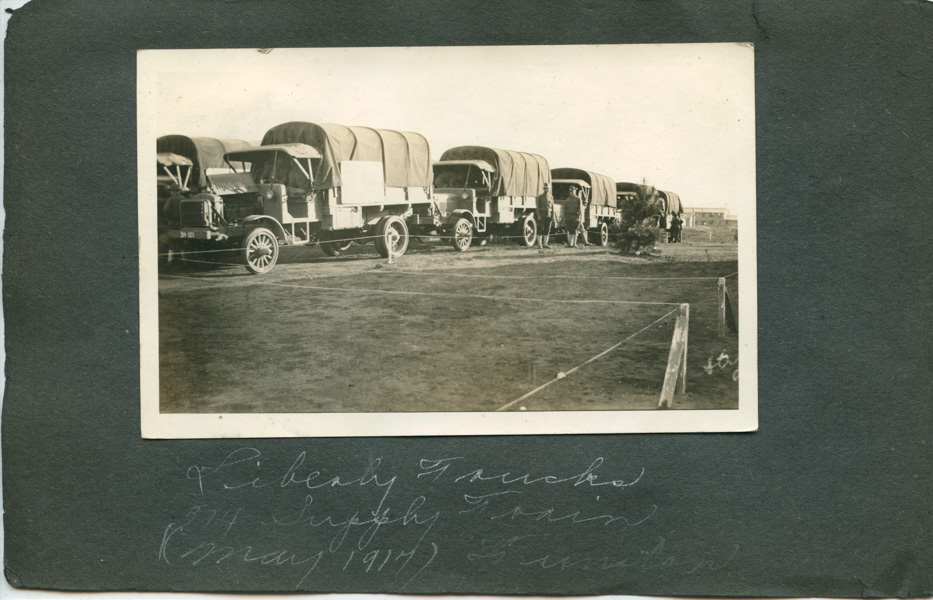
I have four old black-paper albums and a few loose photos showing snapshots of my grandfather’s service during World War I. My project will use the best snapshots and add document images to show grand-dad years as a WWI doughboy.
Family Ties: The Miller Family Reunion, 50 years of Family Memories.
A collection of family reunion photos, or family holiday get-togethers
Wedding Bells: Four Daughters, Six Cousins and Ten Weddings.
Every family has weddings; create an album of weddings, showers, and courtship photos.
Animal House: Those Darn Pets!
Pets your family has known and loved; cats, dogs, hamsters, fish. This could be a fun book that youngsters especially will enjoy.
Remembering Mom: We Remember Mama
A memorial book can be helpful in grieving over a loss, but it doesn’t have to be somber; tell a life story to remember someone you love using selections from your archive. Choose only the best photos that capture a person at lifetime milestones.
Tip: You’ll find more project ideas in How to Archive Family Photos: Chapter 16 Photo-Book Projects.
Step 2: Identify your audience
Don’t give a 600-page family history to your siblings and expect them to read every page. You might have better luck capturing their eye by matching the story to their interest.
- Who is your audience?
- How old are they?
- What are their activities, hobbies, interests?
- Do they travel?
- Do they have a sense of humor?
For example, my seven-year old grandson is fascinated by the soldiers in our family and my dad (the gift recipient of this book) has very little interest in “that old family stuff” but he is an old-car and hot-rod enthusiast. I’m going to emphasize my granddad’s job with military vehicles in the Motor Supply Corps and include uniformed photos that my grandson will like.
My book will be photo-centric with minimal text. Sources and any additional information will be included at the back of the book where they won’t interfere with the “picture book” format.
Aim to create a photo book your audience will love and want to view over and over. Include the “important” photos and use the right voice to help your reader connect with the story you share.
 Step 3: Gather inspiration from a Photo Book Safari
Search the internet to gather ideas and inspiration for your family history photo book.
Set up a Pinterest board, make screenshots, or clip ideas to Evernote to save book ideas from throughout the web. Share ideas on the Genealogy Scan Along Facebook Group.
By nature, a photo book is picture heavy and text light. Think about your objectives when planning your book. Find ideas by exploring photo books and designs offered at different online photo service websites. Make notes on features you like and don’t like:
- Do you have large high-quality photos? Look for designs featuring full-page images.
- Are your photos mostly small snapshots that will need cropping and editing? Look for ideas using multiple photos on one page or collages.
- How are books organized? Chronologically or some other way.
- Do books use large size text, no text, headings?
Start your research with these online photo book sites:
Adorama.com
Blurb.com
Mixbook.com
Shutterfly.com
Snapfish.com
 Step 4: Select your photos
Before working with your original photos, wash your hands with soap and water or wear white cotton or latex gloves; handle photos by the edges. Keep your original photos in an acid free folder or box between work sessions to protect from light, dust, and damage. Work on a sturdy table covered with a cloth or large sheet of paper.
Not every old photo deserves a place in a family history book. Choose the best and archive the rest. Select photos that tell your story. Don’t turn your photo book into a printed version of Uncle Herm’s never-ending vacation slide show.
Select photos that pass the test:
- Does it tell the story?
Look for photos that show a person’s personality, that spark a memory, or that evoke a strong emotional response. - Is it a good photo?
Select images that are well-exposed, focused and have good contrast.
Some technical photo problems can be corrected in your photo editor, such as Auto Adjust for exposure, cropping, or contrast. But you can’t fix truly out-of-focus prints, or enlarge a thumbnail size print to fill an entire page with a sharp image. In those situations, it’s best to pick another photo.
Place your photos “picks” in one acid-free folder and the remaining photos in another folder. Or use “picks” and “seconds” for back up images. Aim to select 30 to 40 images for a 20 to 30 page book. Don’t worry if you don’t have enough photos. You can add scanned documents, newspapers, or other sources to help tell the story and fill the pages. If you have a lot of text, you will need fewer images.
Step 5: Storyboard your book
When . . .
- You have a tentative theme and title.
- You have identified your audience
- You have gathered ideas for book design and organization
- You have selected 30 to 40 potential photo “picks”
It’s now time to plan the sequence of pictures in your photo book. One method is to use “storyboarding,” a great way to visually plan projects of all kind.
If you’d like to learn more about this process, I highly recommend viewing the Storyboard webinars by genealogist and author Lisa Alzo lectures at Legacy Family Tree Webinars. (Note: Monthly and annual webinar memberships allow full viewing of all videos and downloading of handouts. Or purchase individual videos to own.)
Storyboard Your Family History
Storyboarding and Editing with Scrivener
Ready, Set Write! Share Your Family’s Story
Working on a clean table or flat surface in low light, arrange your photos in a tentative timeline or storyboard. Handle photos only by the edges. Re-examine photos to make sure you are using the best image for the story you want to tell. Replace low quality images with better pictures.
For photos in albums, use sticky notes or index cards as working placeholders on your table top timeline. We aren’t scanning yet. We are still thinking and planning.
After working with your selected photos for a short time you’ll have a better idea of how your pictures will tell the story you want to share. Use your smartphone to take pictures of your visual timeline and list photos, in order, on the Photo Book Project Board.
Between work sessions, carefully return the photos to an acid-free folder or box; don’t leave them out on the table where they can be damaged by exposure to light, air, dust, and pets.
Revisit your storyboard this week to tweak photo order and begin writing text and captions. Take your time at this planning stage and enjoy weaving a story with pictures. You’re the storyteller of your family’s photo memories. Enjoy the journey!
Discuss this week’s lesson and ask questions in the Genealogy Scan Along Facebook Group.
I’d love to know if you find this project helpful. Please leave your comments after this post. Happy Memories!
Next Week: Scanning photos, file naming, and digital image management.


I have your book and have entered the URL available in the Appendix “Get Downloads from This Book” but the link returns “Page not found” from FamilyTree. Is there another URL that should be used now?
Thanks for letting me know about the broken link, Theresa. I’ve emailed you about the new download link at FamilyTree.
Hi Denise,
You have inspired me to start a project! Still in the thinking/planning stage, but I am looking at some of your suggestions to decide how to approach my “book!” Thank you so much for planning this scan-along and your guidance in preparing/doing the project!
Noreen Manzella